Showing posts with label router. Show all posts

Wednesday, December 5, 2018

Mini-Tele - Part 3: A splash of color

Subtle...
As previously mentioned - my son asked for a gold guitar.  
I said, "Everything gold?"
He said, "Everything!"

I said, "...okay."
I said, "...are you sure?"
He said, "I'm sure!"

(editor's note - when I told him the humbucker wasn't going to be gold - he got upset)

Okay.  Here we go!

Gold digger
Two things:

1) I've never spray painted a guitar before.  This is my fifth build (sixth if you count the incomplete Les Paul that still sits on top of my fridge) and I've finished all of them with stain, dye, or shellac under a Nitro finish.  I've got nothing against paint - it's just that all of my builds to date have been made with fairly attractive wood that I wanted to showcase and not hide under paint.  So this is new territory for me (read: plenty of NEW mistakes for me to make).

2) The medium of a blog is rife with dishonesty.  I didn't take a lot of photos of the process of painting the guitar.  So, it looks like this went swimmingly.  I can attest that it did not.  Also, time is a plaything in the blog medium.  This thing sat for months in my garage waiting for me to get my backside in gear and finish it.

Lies, damn lies, and statistics...
In brief:  I painted this with a generic gold color I purchased at Lowes and neither I nor my son was all that impressed.  It was only after stumbling on a really metallic gold paint (by accident in A.C. Moore) that we got to the color you see now.  Then, as I was preparing to spray a lacquer finish on it - I decided to wipe it down with some naphtha.  ...It had loads of dust (and cobwebs) on it from sitting all summer in my garage and I wanted a clean surface to spray on.  Yeah, it turns out that naphtha will strip spray-paint off like nobody's business.  So, I had to paint the guitar a third time.  Only this time the temperature had dropped and I was spraying in temps way too cold for rattle cans.  So, I'm not confident in how well the paint bonded to the previous coats.

When I finally did get to spraying lacquer - I was using a new brand - Watco - Lacquer, Gloss, Spray

...Let's just say - I'll never be using that brand again.  Stick with Behlan's Stringed Instrument Lacquer, kids.  It works!

I had already started spraying the neck with Behlans so I decided to not mix the streams with a different lacquer on the neck.  In the end, the body got 8 to 10 coats of Watco and the neck got 8 to 10 coats of Behlans.  The neck looks great (even though I used steel wool to dull the finish) and the body looks barely passable.  I never even finished polishing the body as weird black spots were starting to show up under the finish as I waxed on/waxed off.  This could have been the spray-paint I used, the temperature at which I sprayed things, or the lacquer.  Seeing as the neck had none of these issues and the only difference was what lacquer I used - you be the judge.

How you doin'?
With regards to the neck.  I did a fair amount of work to it.  I received it with a badly damaged finish (which I expected for $25).  I sanded off the existing finish and also reshaped the neck a bit.
Knowing that this will be a first guitar and not likely to be used for more than a year or two in this household - I went for comfort over perfection.  I skinny-ed down the neck at the 1st and 2nd frets
so that it would fit in my son's hand and perhaps make it possible for him to play first position (e.g. cowboy) chords.

Can't complain
I also worked on the fret ends quite a bit.  The fret ends were sticking out like barbed wire - so I filed those down and polished the frets as well.  I did a little fret leveling but not much.  If he gets to the point where he's ready to start ripping out an Angus Young solo - I'll dress these frets to perfection.  For now, the neck fits in his hand, won't cut him, and is mostly in tune.
Had some work done?
I also inlaid an Irish coin into the headstock because for some reason that has become my thing.  In this case, this is the first time I've used legal tender.  This is a 10 cent Euro coin.  I used it because it is gold colored.  It was a fabulous piece of good luck that I had a drill bit that was almost the exact size of this coin.  I'm happy with this part of the build.

So, while it's not perfect - the guitar now has a finish.  It's time to assemble it!

Tuesday, November 27, 2018

Mini-Tele Part 2: Cultural Appropriation

Theft
Never let it be said that a DIY blog about building guitars can't be socially relevant.

Yeah, I can't believe I typed that sentence either...

So what are we looking at?  It's a neck plate, dummy.  No really, it's used for screwing the neck onto a guitar body. And speaking of screwing - it is also a bit of Welsh culture and Druid mythology that I'm taking without asking.  So, for all you Welsh Druids out there - I'm gonna steal your culture.  Look out!

What you are actually looking at is the Druid symbol of the Welsh word - Awen.  Awen means "inspiration" - usually of a poetic nature.  I guess the Druids liked the word and decided it needed a symbol to go with it.  And who are we to judge?

Great Expectations
I thought it would make an interesting image on a neck plate and back in 2015 planned for it to go on the first guitar I finished that year - hence the 2015-001.

(Editor's note - no guitars were finished in 2015).

It just so happened to be a gold neck plate - so it's perfect for this build.  Better late than never!


I like the cut of his jib

Speaking of necks - we're gonna need a place to put that thing.  I routed out the neck pocket on this body blank using the process I have used on the last couple of builds that I've worked on:  Trace the outline of the neck shape on a piece of particle-board (or plywood) and cut out that shape with a jigsaw.  Then use that shape as a tracing template for my router.  What you can't see in the above picture is that everything to the left of that last fret is the overhang.  The thickness of the whole neck minus the thickness of the overhang is how deep the neck pocket needs to be routed - so that the overhang sits flush to the body.

Flush
As is quite typical at this point - things fit pretty well.  The neck fits in the pocket nice and tight and the neck is straight and level.  It's only later - when I start monkeying with things - that I'll mess it up!


"Aren't you a little short for a StormTrooper?"
 As you can see - this is a short-scale thing we're building here.  A normal guitar has a scale length (the distance from the bridge to the nut) - or total string length of 24.75 to 25.5 inches.  This puppy will be about 20.5 inches.  Also, the width and depth of the neck are much smaller than a normal neck.  Hopefully, this will make it easier for little hands to hold it.

Diggin' Holes
In addition to the neck pocket, I also routed out the hole for the pickup.  I'm going to go with a Humbucker for this build for two reasons: I already have one left-over from another build and humbuckers are quieter than single-coil pickups (as in they don't hum as much - hence hum-bucker).
I already have a humbucker routing template so this went fairly quick.

Diggin' More Holes
 I also drilled the hole for the input jack (where the guitar cable plugs into the body). If you look at the center of the hole you'll see a little light.  That's the pickup cavity in the previous picture.
The below picture is a detail shot of this.  I chose to go really primitive with the electronics for this build as I didn't want to overwhelm my Son with switches and knobs and I didn't want to overwhelm myself with soldering headaches.

Holes inside holes.
When I'm done with this build it will have one pickup, one volume knob, and an input jack.  Low-tech but just enough to do some damage.

Thursday, October 19, 2017

More tools and jigs

Am I a Liar?
Yes.  Yes, I am a liar.

So, I decided to start working on the Les Paul again after a loooooooong hiatus.
I got myself all psyched up to get my hands dirty fixing the neck and neck pocket.  This morning I took the body and neck down from the fridge, took one look at it and decided, "I'm not working on the neck pocket today. " Even though I haven't touched this project in 18 months - I'm going to 'switch gears' and work on the neck.

Okay - here we go...

I had alluded to the fact that I was going to make some drastic changes to the neck in a previous post. Here's where we dig into that process.  My plan is to take the existing neck that I bought from Guitarfetish and add the following:

  1. A headstock veneer to match the body
  2. Binding all around the neck
  3. Replace the existing diamond inlays with standard Les paul 'block' inlays
  4. Install an Irish coin inlay (most likely a 1 penny piece) in the headstock
If you've been following along - I finished the headstock veneer a while back.

Today we'll look at how to do the binding around the neck.
The binding was going to be a mixture of easy and hard.  Most of the binding was going to be set in straight runs (with few curves) but I wasn't sure how I was going to route the channel for the binding as I don't own a router table.  This kind of work is hard to do freehand with a router as the neck is curved on both sides and tapered to boot.

After a quick trip to google - it became clear that I had all the necessary parts to build my own primitive router table.  So, first up: build a router table.

Kinda looks like a reject from 'The Lego Movie.'

 The process is actually quite brief.  Take the bottom plate off of your router, trace the outline of it on a flat and wide board (most people use plywood or melamine as they don't warp easily. I used Particle Board which also doesn't warp easily but isn't as durable - it's what I had on hand).

Make sure to mark off where the holes go to attach the board to the router and start drilling holes.  I made a one inch hole in the middle of a sheet of particle board for any router bits to fit through and drilled four 1/8 inch holes for the mounting screws.  I also used a 1/4 inch forstner bit to countersink the screws so that they don't bump into the workpiece.

Once the holes are all drilled - screw the router base onto the bottom of the board, turn the board upside down, mount it to something (I used a black and decker workmate bench), and adjust the height of the router bit until it pokes through the hole.  Voila!

It took almost as long to write this description as it took to make the thing itself.

For any of the more seasoned luthiers/woodworkers out there - this is a temporary router table.  I'm aware that this won't last (particle board warps).  But it got the job done and I didn't have to drop $300 at Rockler.

Anywho!  This particular router bit is larger than the ball bearing on the top - so the ball bearing runs along the work piece and the blade cuts deeper leaving a channel that I can use to install the binding around the neck.

What? Me worry?

As the last several post about binding have proven - I have no idea what I'm doing!  So, we'll see how this goes.  But for now - there is a channel for binding, I have already purchased neck binding, and there's no legal or ethical reason why I can't just bind this sucker at any given moment.

Friday, August 18, 2017

You know what this guitar needs? Holes.

Looks like it's got plenty of holes to me

Here we are again.
That magical time when a man and his router think toward guitars.
I mean, I could just sit here and fiddle with bindings and chip out ( by the way - at some point we're gonna need to deal with those bindings and chip outs) - but where's the fun in that?

No! It's time to dig some holes!
(For some reason I have Craig Ferguson's voice in my head while I say this.  ...and now you do too.)

As you can see - holes were dug. Here's how it all went down.

A guitar needs a certain amount of holes - a semi-hollow guitar more than other types. 
You need the holes for the pickups, the tone and volume controls. You also need the hole for the input jack and the pickup selector switch.  Some of the more esoteric orifices you will need are holes in the pickup cavity for the wires to the volume/tone knobs.  In a sense - you need holes within holes.

As it happens I have already made the holes for the bridge (for the screws that hold it down and the holes for the strings to thread through the body).  I also made the neck pocket and the sound hole.
So, what I'm saying is - there are a bunch of holes in this thing.

This was my iPhone's "Yellow Period"  Kind of like Picasso's Blue Period but dumber.

On this day I started with the tone/volume/switch controls. 

Here's a thing you should know if you are just starting out in woodworking - wood splinters.

No, seriously, if you drill through a board (or in this case a guitar top) the top of the hole will look nice and neat but the other side of the board will look like a splintered mess - unless you brace it with something.  The easiest way to do this is to put a piece of scrap wood under your workpiece and drill through both.  The thing you care about will look good and the scrap will not.

Yeah, I kinda screwed myself on this one.  There's no way to brace the underside of the top while I drill through it as I can't get any wood into the body of the guitar and under the top to brace it.
What's the take-away?  Pre-drill stuff like this before you glue the top down.

"What's the difference?  No one can see it."

True.  But, if the top splinters like that it becomes weaker at that spot.  Also, I have to put a control potentiometer (pot for short) under there.  It'll be easier to attach to a clean (non-splintered) surface.

So, what I did to mitigate the splintering was to drill a small hole and use a reamer to make the hole bigger. The reamer cuts "out" not "down" so there is less splintering.  And that worked - to a point. Specifically the point of the reamer touching the inside of the guitar preventing me from going any further.
From there I used three or four drill-bits of ascending sizes to 'ream' the hole.
Yeah, I thought that was going to be easier too.  Murphy was an Optimist.

By the way - I'd love to tell you what size these holes should be but as the four different Pots that I used as guides all had different diameters - you should probably measure yours if you are playing the Luthier Home Game.

Just airing out my bits...

Next came the input jack hole.  Again - another learning experience.  What I should have done was to use a forstner drill bit of the correct size and drill the hole once.  Instead I ended up using two standard drill bits and two paddle drill bits to 'step' my way up to the correct size. Yes, it was messy.
Listen to me:  Don't do it this way.  It's a waste of time.  Use the right tool for the job.  Especially when you HAVE the right tool for the job.  Luckily I also had a drum sander bit (man, I have a lot of drill bits...) and was able to sand the hole clean.

I think I've seen this image somewhere before...

The pickup cavities:  This actually went pretty well.  Eight years ago (good gravy!) when I started this build, I bought the pickups and made a template out of them - just for this occasion.  So, I was ready to go.  See that kids? Planning ahead can have positive effects.  If you've been reading along - you get the gist.  There was a router bit with a pattern tracing ball-bearing on it and I traced the pattern with the router.

Might be time to sharpen this guy


The toughest part about this process was drilling the holes in the pickup cavity for the wires to connect to the switches and knobs. After my first build I bought a super long drill bit (again, more bits) just for this job.  But somewhere along the way the bit snapped in two.  I tried using the remaining piece (and it DID work) but it wasn't a clean cut (as you can see) and I'll be getting a new one of those bits soon.

We're in a hole to nowhere.  Come on inside.


I do still have some shaping to do on the pickup cavities as the pickups don't fit as nice as I'd like - but that's just a few minutes work with a chisel.  For the most part - this puppy has all the holes it will need.

Okay, maybe not all the holes.  There's the strap holes, mounting holes for the pickups, and then there's the holes for the tuning peg screws, a hole for the neck adjustment screw...


Monday, October 19, 2015

Unbound

Perfect!  Don't change a thing.

Binding is one of those things...  When it's done well it makes everything look super fantastic and if you mess it up - there's pretty much no way to hide it.  So, let's aim for 'done well' rather than messed up. Sound good? 

The binding I purchased is fairly long and will allow me to go around the body in one shot.  You can bind the body using two pieces that meet at the butt of the guitar.  Quite often that's how acoustic instruments are bound but it's hard to hide the joint and with plastic binding there's not much impetus to do it that way.  Gluing this much binding all at once can be tricky - but there are ways to prep it for installation - one of those ways is to pre-bend it

The binding is pretty thick and while it is pliable it tends to spring back into it's original shape.  The best way to fix that is with a heat gun.  
Heat gun you say?  Looks like a hair dryer to me.
As an aside - heat guns are for stripping old paint off of wood.  So, yes, they get quite hot.
I'm just gonna put this out there:  Don't use a heat gun as a hair dryer.  Just don't do it.

The goal is to warm the plastic enough to make it very pliable (not melted) - then quickly shape it before it cools.  Once it does cool it should retain the new shape.  As I had the routing template I made for the Les Paul kicking around the shop - that seemed like the right thing to tape it to.  It's not a perfect match for the guitar body but it will be close enough.

Perspective is a funny thing.  It's a heat gun - not a heat cannon.
It looks like I taped it down and then applied heat to the binding - but really what's going on here is I'm keeping the rest of the binding out of my way.  Since you can only warm up, shape, and tape about 3 or 4 inches at a time - I would work on a section and tack it down with a bunch of masking tape - then move along the body to the next 3-4 inch section.  Those pieces of tape that are really spaced apart would be discarded or reused when I got to that section of the body.

There's always one in every crowd...
The toughest section is the horn and cut-away due to the sharp turn the binding has to make.
I went back after taking this photo and redid that section - as it wasn't quite right.  As you can see - you need a bunch of tape for this part.

One note: I had the heat gun really close to the binding while I was working on this section - like 1 to 2 inches away.  That's probably a little too close.  2 to 4 inches would have been smarter.  The reason I think this is is because the binding drooped (as in toward the floor) when I was bending it around the horn.  That drooping changed the shape of the binding (the word I'm so studiously avoiding is malformed), so it looks like there is a bit of a twist in that section of the binding.

The method of gluing, scraping, and sanding the binding after it is installed should fix or hide the twist.

...I hope...

I can't tonight - I'm all tied up.
So now this guy sits while I find a more permanent home for him...


Looks like another jig to me, Jebediah. What say you?
Ayep. That's a jig all right.
Here's the thing about binding an arched top...
It's arched.  So, you can't rest a router on top and make a straight channel for the binding to sit in.
You have to go build something (or buy something) to make a uniform channel.
This is what I built:

Keep all hands and feet away from the spinning blades of death.


Two asides:
1) I have had to build more jigs and templates on this project than on my four previous guitar builds combined.  Les Paul's are not easy to make (it explains why they cost so much to buy).

2) This isn't the safest jig in the world.  It worked fine for this task but there are better ways to do this.  The guitar body could have easily become jammed between the router blade and one of the side supports.  It's always a good idea to have a place for the the wood to go if it gets thrown by a tool.  This jig only allows for two ways - out the back or back in your face.  So next time I may try to build a pin router.

Okay, one last aside: I used a piece of white Ikea shelving to raise the workpiece up high enough for the blade to cut the channel.  I chose the shelf material because it was so smooth that the work piece would slide over it easily (the better to eat you with my dear).  You could also use melamine for this.

Come closer...
This bit has a ball bearing on it that is smaller than the blade circumference - when the ball bearing touches the work piece the blade cuts in a little deeper than the bearing.  You can buy bits and bearings of different sizes to make larger or smaller channels.  I knew from testing on a piece of scrap that the binding was going to be about 1/32 of an inch bigger than the channel - so I'll have to scrape off the extra with a cabinet scraper.  Better to be a little bigger than a little smaller in this case.

As you can see from the above pictures I clamped the jig to the workbench (I also clamped the Ikea shelf too but didn't take a picture of that) so everything was rock solid.  Put your safety glasses on, hit the power button and whisper a fond farewell to your fingers.

I wouldn't hurt a fly...
...on that note.  I kept the work piece between me and the router bit at all times.  Yes, it would suck to damage the body after doing so much work on it.  It would suck much more to lose a finger.  My heart rate still spikes every time I turn the router on.  It's a healthy reaction.  End of PSA.

One of the best ways to avoid having the router throw the work piece is to be aware of which direction the blade is spinning and to "always feed against the rotation of the blade."

As you can see - it worked!  The router/jig combo made a fairly neat cut.  I made two slips but was able to clean them up by making a second pass that was a 1/16th of an inch deeper than the first cut.  Since the binding is so big that wasn't an issue.  ...sort of.

Eh!?  Eh?!!

Not too shabby!

Look at them appl...
Wait, what?
That looks pretty deep, right?  Perhaps a little too deep?  It doesn't match up with the rest of the binding channel, does it?  No.  It doesn't.  But it's not supposed to.  I knew the binding channel  around the neck was going to be much deeper than the rest of the body due to the way the top was carved.  If you look at all the templates that I made for the top carve - they all have one thing in common - they mask this area of the guitar.  So, this part of the guitar is closest to the original size of the lumber.  I did route an angle into this area but it's still higher than the rest of the carved top.

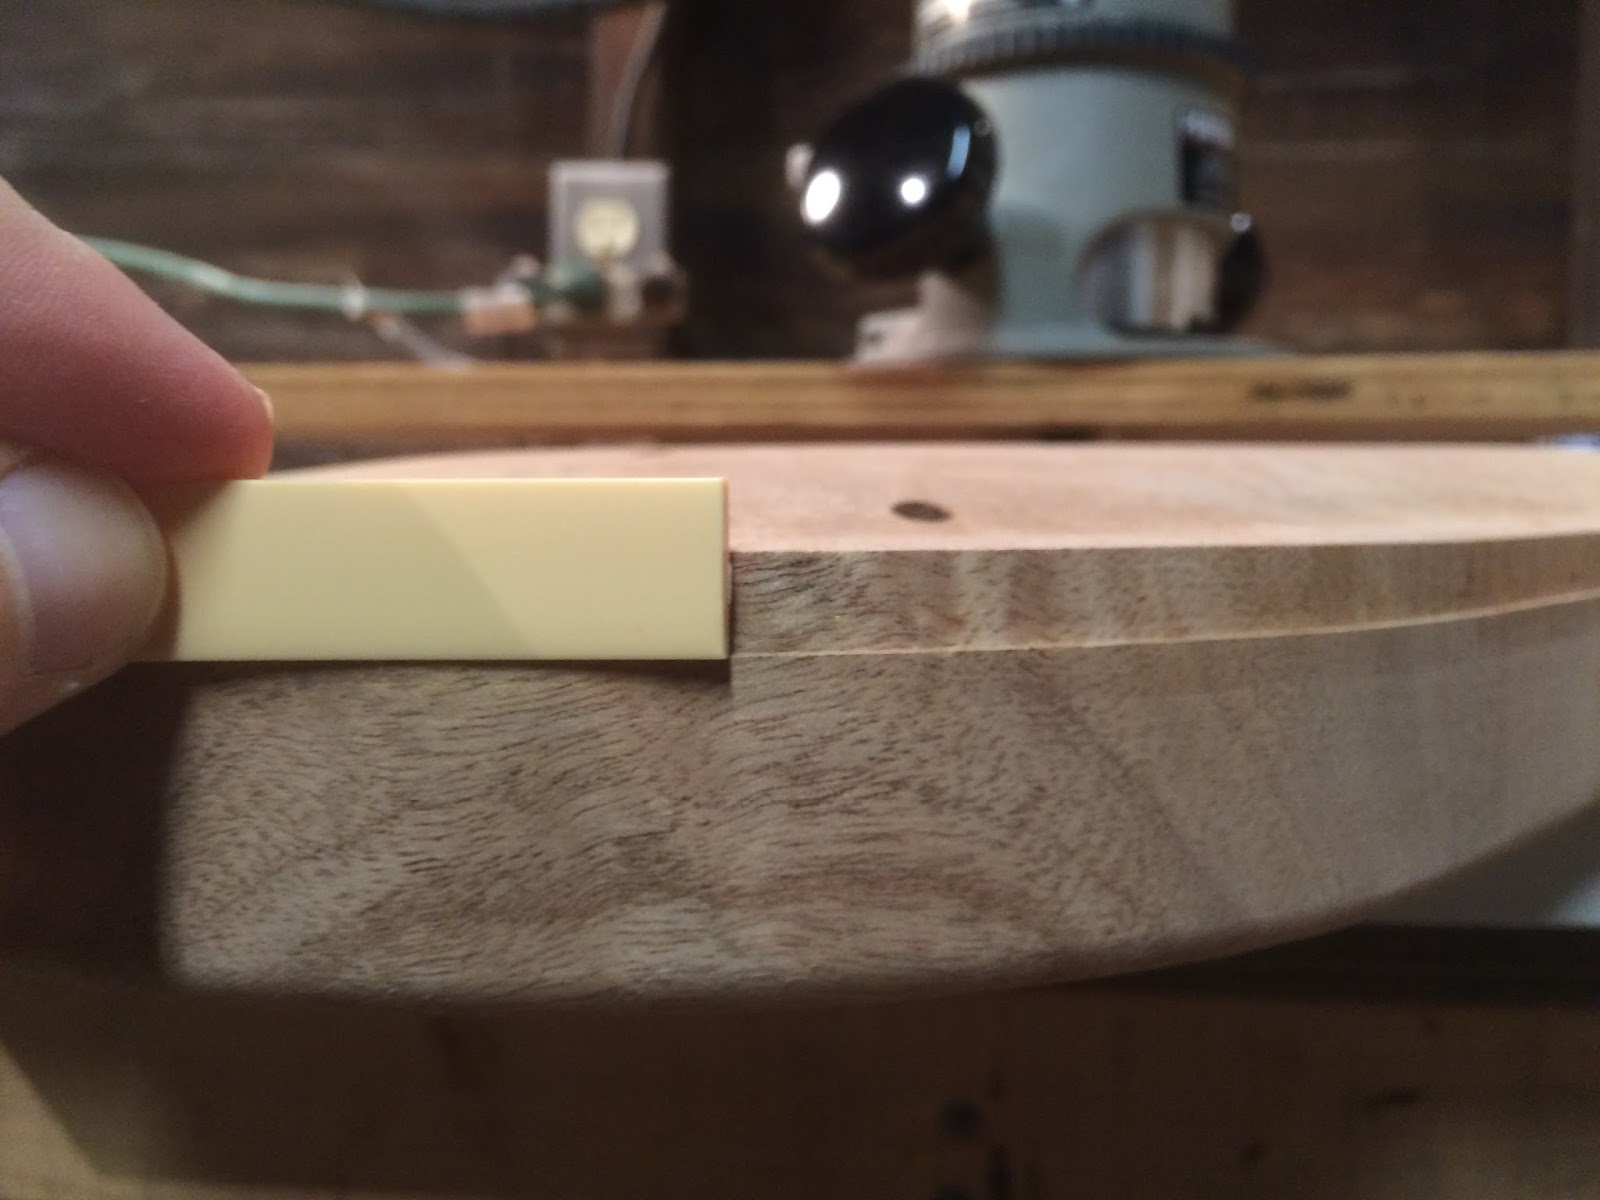
I took a small piece of binding and placed it in the channel at different locations around the body to illustrate:
I know what you're thinking...

You are saying to yourself...

Where does this guy...
Get his nails done?

As you can see - there are a lot of places where the binding will need to be scraped away (quite a bit towards the butt of the guitar).  In the neck pocket I'll probably sand the top of the body down to meet the binding instead of trying to layer the binding to fit the channel.  Believe it or not this is how Gibson did this on older versions of Les Pauls.  If it looks silly I may change my mind - but for now - I'm gonna leave it.

It's never a bad idea to clean up the route.  I made a couple of light passes with the card scraper, a utility blade (to really get into the corners), and some sandpaper wrapped around a piece of binding.

Do you know how to use this thing?

Stick 'em with the pointy end


That's the essence of it, yes.
And now I'm ready to bind this sucker.  But obnoxiously enough I'm undecided as to which adhesive to use: Weld-on cement, Wood glue, Super-glue, epoxy, or binding paste (aka binding goo) are all viable options.  So, while I go do some research - here's where we stand:


Soon...

Monday, September 28, 2015

What does it have in its pocketses, Precious?

Pictured: Time to put my Router where my mouth is.
(Okay, for real kids, don't do that.  Like, ever.)

To me - this is the most nerve wracking part of any guitar build.  There comes a time when all fun and games are over - and you have to route a neck pocket.  I've talked about this in other blog posts - but this really is the most crucial cut you will make building a guitar.  In my mind - everything else is ergonomics and aesthetics.  

So what if your pickup cavities are too deep or slightly off-center? 
There are pickup rings and springs to compensate for it.  

So what if your volume/tone knobs are a little to the left or right of where they should be? 
Stretch your fingers a little 'cupcake!'

I'm gonna get you, sucka!
This part of the build determines whether or not the guitar is going to be playable.  Period.  Mess this up and you have a pretty looking piece of art vs. a smooth playing instrument. The only other act of wood-working that is as crucial as this one is when you install the bridge.  
...and we'll get to that in due course.  So, as you can tell, I take this part pretty seriously.

Now is the time to repeat the wood-worker's mantra, "Measure twice, cut once."

Measure twice, cut once.  Measure twice, cut once.  Measure twice, cut once.
Since I'm still fairly new to this - I measured about six or seven times.  No, seriously, I had three different straight edges, a couple of rulers, and at least one level out while I was setting up this cut.

I am also lucky - in that I have a bolt-on Les Paul to use as a reference.  I was able to run between my garage and my music room a couple of times to take measurements.  If you do not have an Epiphone Les Paul kicking around - I recommend going to a guitar store and asking if you can take some measurements.  Most of the small shops will be cool with it - if you are polite and gentle with their merchandise (I am speaking from experience).

Because I have a bolt-on Epiphone Les Paul at my disposal - I was able to determine that the neck pocket is closer to 3/4th of an inch deep vs. the 5/8th of an inch that most Fender neck pockets have. In my research I wasn't able to determine if Epiphones have a standard neck pocket depth (like Fender does) so I split the difference on this build.  Currently the neck pocket on my build is just shy of 3/4ths of an inch.  But - by the time I am finished sanding the top the pocket will be closer to 11/16th of an inch deep.

...or at least that is my current plan...

All this is just a way of saying - I'm working it out.  Stay tuned as to how it goes...

Small but fierce!
If you have been following along - you know what's next.  I routed, and routed, and routed some more using the template and template bit above.  The reason for all this routing is because I didn't take more than 1/4 of an inch off on any one pass.  It is also the reason you want to make sure your template is accurate and securely fastened to the body.  If your template shifts during the second or third pass - you are going to have all the feels.
(See? Isn't that an awkward phrase?  Why don't we stop using it...?)

One note - I waited until this point to route the neck pocket because if I did it prior to this the pocket wouldn't be angled.  Since the top has a 4 degree angle in it (and I put the template on top of that) the pocket has a 4 degree angle to it.  It's hard to see in the below picture - but trust me - it's there.  This is going to help when I install the bridge.

Success?
I was so focused on getting this right - I didn't take any photos of the process.  Once the neck pocket was done, however, I took some shots of how it all turned out.  If you look closely in the above picture you can see that the Lacewood will be rather prominent at the cutaway.  Once it is sanded and finished it's going to look pretty sexy.  That's a wood-working term.


"You have learned much my young Padawan.  But you are not a Jedi yet."

The end product looks good - so far.
The neck joint isn't as tight as purists say it should be (I can't currently carry the guitar around by the neck.  

...but it's close.

Once I put a finish/varnish on the neck - this is going to be one tight joint.  Oh, and there will be four frickin' screws holding it in too!  Silly purists.  But seriously, I subscribe to the idea that wood will expand and contract with the weather/seasons.  It's probably a good idea to allow a little tolerance for that.  Having said that - I'm not going to pretend that I wasn't aiming for a super tight fit.  I'm still working on the whole 'precision' thing.

Thank goodness for the Fret Board Hangover.

I still have to do a decent amount of work on this neck:
I will definitely be putting some kind of veneer on the headstock.  What kind? I don't know yet. Possibly something to match the body.

Looking at the rest of the neck I keep wondering if I want to keep the existing fret markers (the diamonds).
...or do I want to try my hand at some inlay work...?

If I had completely bollocksed this up - you would see a much bigger gap right here.

I am also intrigued by the idea of binding the fretboard.  Which is a butt-load of work and should be completed before the frets are installed but I'll hold off judgement until after I bind the top.
Oh yeah, I also have to flatten and polish the frets, don't I...?
Hmmm...  Still lots to do...

Wow.  That almost looks right.
Sweet!

So!
Here we are...
It LOOKS pretty good but looks have no bearing on playability.  
For now,  I am cautiously optimistic.  And for the purists - there is nothing holding the neck in that neck pocket in this picture except the tightness of that joint.  So, there may be hope for me as a wood worker yet.

"Every girl's crazy 'bout a sharp square joint."