Wednesday, August 23, 2017

Oh, look... More Binding...

That'll buff right out...

Now that the body has most of the holes routed/drilled it's time to start fixing my earlier mistakes.
When I left off with this build (seven years ago!) the binding was incomplete and in the intervening years it has developed a few additional - oh let's call them "issues."

Looks fine (if you turn your head and squint a bit).

A piece fell off around the smaller horn (and that broken piece is long gone), a couple of cracks have been there all along, a section came unglued, and I never did the bend around the bigger horn properly in the first place.  So!  There's much to do.

Don't be so picky. 

The answer to all my problems.

This binding (unlike the plastic binding I used on the Les Paul build) is made of Cocobolo.  A fabulous wood that is dense, oily, aromatic, and water resistant.  If you have ever tried to bend wood before then you know water is usually an important part of the process.  Not so much with Cocobolo. This stuff is so dense and oily it's one of the few wood types in the world that doesn't float.  You pretty much just use heat to bend cocobolo.  In this case - the same heat gun we used for the Les Paul binding.

Feelin' Hot, Hot, Hot!

Also, because Cocobolo is so naturally oily you have to "degrease" it before you glue it.  So keep some Acetone on hand prior to gluing. Wipe all of the cocobolo pieces down with a rag dipped in acetone. Again, this stuff isn't the best thing in the world for you (according to the State of California) - so don't bathe in it.

Look! I found my Special-purpose!

I can't speak for other woods but with Cocobolo you really have to "listen" to the wood while you're bending it.  I usually use a stethoscope...

I'm sure there is a joke in here somewhere about men "listening" so I'll just let you fill in the blanks.

But seriously, as you apply the heat the wood will very quickly go from stiff to pliable.  It's not a specific amount of time (or heat) but usually it's less than a minute of direct heat before it starts to bend.  If you see the wood turning black or the wood resins bubbling you've gone too far - ease back on the heat.  You want it JUST before that point.

The thing about heating and bending wood this way is that you really need a third hand.  One hand to hold the heat gun, one hand to bend/reshape the wood and a third hand to tape it down.

A fourth hand to photograph it all wouldn't hurt either

If you don't tape the binding down immediately - as it cools it will start to go back to it's original shape.  It won't completely go back to it's original shape but you will lose a lot of those lovely curves you just created.

Quick tip: Don't use foil duct tape (or actual duct tape) like in the picture.  Use low tack masking tape or painters tape.

Like with plastic binding - you can use a bunch of different things to glue the binding down with.  On this particular evening I used medium viscosity super glue.  Since this is a wood binding being glued to a wood guitar body - you could use PVA (Wood) glue and it would give you more working time.
I wanted to scrape and sand the body in the same night as gluing the binding down - so I chose superglue.  Also - it's supposed to work better with cocobolo.   I'll let you know.

Remember to use just enough to glue your fingers together but not enough to glue what you actually wanted adhered.

Mmmmm... Toasty
So, remember when I said use enough heat to bend the binding but not enough to cook it?
Yeah, "Do as I say.  Not as I do."  This is a little cooked.  I'm hopeful the charred parts will scrap off.
Patience is a virtue.  Just not one of mine.

The glue on the above piece of binding has dried and this little section is ready to be cleaned up.
You use a similar process as you would for plastic binding: scrape the sides with a card scraper (or small plane) and sand smooth.  One thing that is different about using cocobolo is that the oils can stain adjacent wood while you are sanding (which it did for me).  I also used a utility razor blade as a card scraper as it is good for detail work.

Pictured: A lack of virtues
You may be able to see that in the picture above the bit on the end is broken.  I tried to force the cocobolo to bend too much too soon.  Take your time and this won't happen.

Oh look!  New problems.
One of the things that you learn working with wood bindings is that if you heat up an old section of previously glued binding for too long - it may come UN-glued.  I'm not sure how you would avoid this (tape the old binding down?) but thankfully it's an easy fix - and in this case not completely unhelpful.  I plan on trimming the two pieces of binding until the meet in the middle. Having them free like this let's me test the fit as I trim them to the correct size.

In process...
 I was able to clean up quite a few of the binding issues but not all of them.
...and I was starting to get sloppy - so I stopped for the night partway through the process.

I'll be honest - probably the most valuable lesson I've learned from building guitars is knowing when to just stop for the night and pick it up the next day.

There is more fiddly work to be done but this body is one step closer to being a guitar than it was yesterday.

Not quite there yet...
Lessons learned?  For those playing the Luthier Home Game (or anyone who works with wood) some people find the sawdust of Cocobolo irritating to their sinuses.  I did. Wearing a mask when using it is probably a good idea.

Cocobolo is still one of my favorite woods to look at.  Maybe not one of my favorites to make bindings from.  But as it's the only wood binding I've tried so far - I have no basis for comparison.
Still, it cleans up real nice.


Getting purdy.

Friday, August 18, 2017

You know what this guitar needs? Holes.

Looks like it's got plenty of holes to me

Here we are again.
That magical time when a man and his router think toward guitars.
I mean, I could just sit here and fiddle with bindings and chip out ( by the way - at some point we're gonna need to deal with those bindings and chip outs) - but where's the fun in that?

No! It's time to dig some holes!
(For some reason I have Craig Ferguson's voice in my head while I say this.  ...and now you do too.)

As you can see - holes were dug. Here's how it all went down.

A guitar needs a certain amount of holes - a semi-hollow guitar more than other types. 
You need the holes for the pickups, the tone and volume controls. You also need the hole for the input jack and the pickup selector switch.  Some of the more esoteric orifices you will need are holes in the pickup cavity for the wires to the volume/tone knobs.  In a sense - you need holes within holes.

As it happens I have already made the holes for the bridge (for the screws that hold it down and the holes for the strings to thread through the body).  I also made the neck pocket and the sound hole.
So, what I'm saying is - there are a bunch of holes in this thing.

This was my iPhone's "Yellow Period"  Kind of like Picasso's Blue Period but dumber.

On this day I started with the tone/volume/switch controls. 

Here's a thing you should know if you are just starting out in woodworking - wood splinters.

No, seriously, if you drill through a board (or in this case a guitar top) the top of the hole will look nice and neat but the other side of the board will look like a splintered mess - unless you brace it with something.  The easiest way to do this is to put a piece of scrap wood under your workpiece and drill through both.  The thing you care about will look good and the scrap will not.

Yeah, I kinda screwed myself on this one.  There's no way to brace the underside of the top while I drill through it as I can't get any wood into the body of the guitar and under the top to brace it.
What's the take-away?  Pre-drill stuff like this before you glue the top down.

"What's the difference?  No one can see it."

True.  But, if the top splinters like that it becomes weaker at that spot.  Also, I have to put a control potentiometer (pot for short) under there.  It'll be easier to attach to a clean (non-splintered) surface.

So, what I did to mitigate the splintering was to drill a small hole and use a reamer to make the hole bigger. The reamer cuts "out" not "down" so there is less splintering.  And that worked - to a point. Specifically the point of the reamer touching the inside of the guitar preventing me from going any further.
From there I used three or four drill-bits of ascending sizes to 'ream' the hole.
Yeah, I thought that was going to be easier too.  Murphy was an Optimist.

By the way - I'd love to tell you what size these holes should be but as the four different Pots that I used as guides all had different diameters - you should probably measure yours if you are playing the Luthier Home Game.

Just airing out my bits...

Next came the input jack hole.  Again - another learning experience.  What I should have done was to use a forstner drill bit of the correct size and drill the hole once.  Instead I ended up using two standard drill bits and two paddle drill bits to 'step' my way up to the correct size. Yes, it was messy.
Listen to me:  Don't do it this way.  It's a waste of time.  Use the right tool for the job.  Especially when you HAVE the right tool for the job.  Luckily I also had a drum sander bit (man, I have a lot of drill bits...) and was able to sand the hole clean.

I think I've seen this image somewhere before...

The pickup cavities:  This actually went pretty well.  Eight years ago (good gravy!) when I started this build, I bought the pickups and made a template out of them - just for this occasion.  So, I was ready to go.  See that kids? Planning ahead can have positive effects.  If you've been reading along - you get the gist.  There was a router bit with a pattern tracing ball-bearing on it and I traced the pattern with the router.

Might be time to sharpen this guy


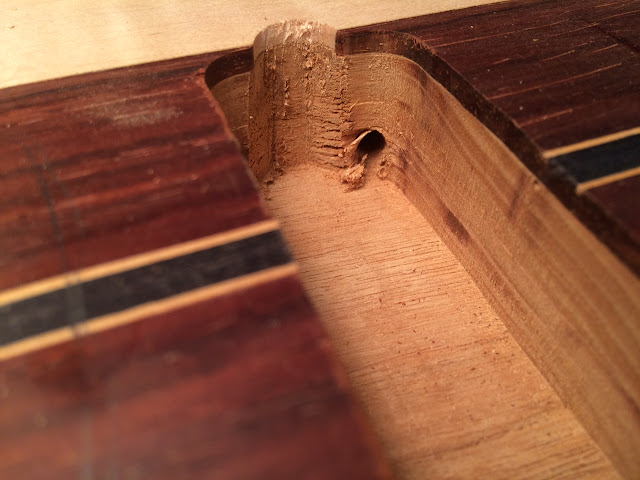
The toughest part about this process was drilling the holes in the pickup cavity for the wires to connect to the switches and knobs. After my first build I bought a super long drill bit (again, more bits) just for this job.  But somewhere along the way the bit snapped in two.  I tried using the remaining piece (and it DID work) but it wasn't a clean cut (as you can see) and I'll be getting a new one of those bits soon.

We're in a hole to nowhere.  Come on inside.


I do still have some shaping to do on the pickup cavities as the pickups don't fit as nice as I'd like - but that's just a few minutes work with a chisel.  For the most part - this puppy has all the holes it will need.

Okay, maybe not all the holes.  There's the strap holes, mounting holes for the pickups, and then there's the holes for the tuning peg screws, a hole for the neck adjustment screw...


Decisions, decisions, decisions...

So close. But so far away

It has been almost two years since my last post about building guitars. I'm not really sure where all that time went.


You see a guitar body.  I see a 'to do' list.

As you can see, I have two projects that are pretty far along (and another two projects that are just starting out).

I have, in fact worked on these two projects here and there (but not much) in the last two years - I just haven't written about it.

The Les Paul (the darker of the two in the pictures above) needs more work but is the one I've been working on more 'recently.' The 12 string semi-hollow is much older. I started it about 8 years ago but is pretty far along. So, which one to work on?

Shiny!

I'm kind of thinking I'll start with the 12 string. It would be nice to FINISH a project - and that one is closer.

Sorry Les Paul.  Your day will come.
...soon, I hope.


The original blog for this build can be found here: https://jerrys12.blogspot.com/
I'm going to finish the 12 string build on this blog.

Once more into the breach!