 |
| Perfect! Don't change a thing. |
Binding is one of those things... When it's done well it makes everything look super fantastic and if you mess it up - there's pretty much no way to hide it. So, let's aim for 'done well' rather than messed up. Sound good?
The binding I purchased is fairly long and will allow me to go around the body in one shot. You can bind the body using two pieces that meet at the butt of the guitar. Quite often that's how acoustic instruments are bound but it's hard to hide the joint and with plastic binding there's not much impetus to do it that way. Gluing this much binding all at once can be tricky - but there are ways to prep it for installation - one of those ways is to pre-bend it
The binding is pretty thick and while it is pliable it tends to spring back into it's original shape. The best way to fix that is with a heat gun.
 |
| Heat gun you say? Looks like a hair dryer to me. |
I'm just gonna put this out there: Don't use a heat gun as a hair dryer. Just don't do it.
The goal is to warm the plastic enough to make it very pliable (not melted) - then quickly shape it before it cools. Once it does cool it should retain the new shape. As I had the routing template I made for the Les Paul kicking around the shop - that seemed like the right thing to tape it to. It's not a perfect match for the guitar body but it will be close enough.
 |
| Perspective is a funny thing. It's a heat gun - not a heat cannon. |
 |
| There's always one in every crowd... |
The toughest section is the horn and cut-away due to the sharp turn the binding has to make.
I went back after taking this photo and redid that section - as it wasn't quite right. As you can see - you need a bunch of tape for this part.
One note: I had the heat gun really close to the binding while I was working on this section - like 1 to 2 inches away. That's probably a little too close. 2 to 4 inches would have been smarter. The reason I think this is is because the binding drooped (as in toward the floor) when I was bending it around the horn. That drooping changed the shape of the binding (the word I'm so studiously avoiding is malformed), so it looks like there is a bit of a twist in that section of the binding.
The method of gluing, scraping, and sanding the binding after it is installed should fix or hide the twist.
...I hope...
 |
| I can't tonight - I'm all tied up. |
 |
| Looks like another jig to me, Jebediah. What say you? Ayep. That's a jig all right. |
It's arched. So, you can't rest a router on top and make a straight channel for the binding to sit in.
You have to go build something (or buy something) to make a uniform channel.
This is what I built:
 |
| Keep all hands and feet away from the spinning blades of death. |
Two asides:
1) I have had to build more jigs and templates on this project than on my four previous guitar builds combined. Les Paul's are not easy to make (it explains why they cost so much to buy).
2) This isn't the safest jig in the world. It worked fine for this task but there are better ways to do this. The guitar body could have easily become jammed between the router blade and one of the side supports. It's always a good idea to have a place for the the wood to go if it gets thrown by a tool. This jig only allows for two ways - out the back or back in your face. So next time I may try to build a pin router.
Okay, one last aside: I used a piece of white Ikea shelving to raise the workpiece up high enough for the blade to cut the channel. I chose the shelf material because it was so smooth that the work piece would slide over it easily (the better to eat you with my dear). You could also use melamine for this.
 |
| Come closer... |
As you can see from the above pictures I clamped the jig to the workbench (I also clamped the Ikea shelf too but didn't take a picture of that) so everything was rock solid. Put your safety glasses on, hit the power button and whisper a fond farewell to your fingers.
 |
| I wouldn't hurt a fly... |
One of the best ways to avoid having the router throw the work piece is to be aware of which direction the blade is spinning and to "always feed against the rotation of the blade."
As you can see - it worked! The router/jig combo made a fairly neat cut. I made two slips but was able to clean them up by making a second pass that was a 1/16th of an inch deeper than the first cut. Since the binding is so big that wasn't an issue. ...sort of.
 |
| Eh!? Eh?!! |
 |
| Not too shabby! |
 |
| Look at them appl... Wait, what? |
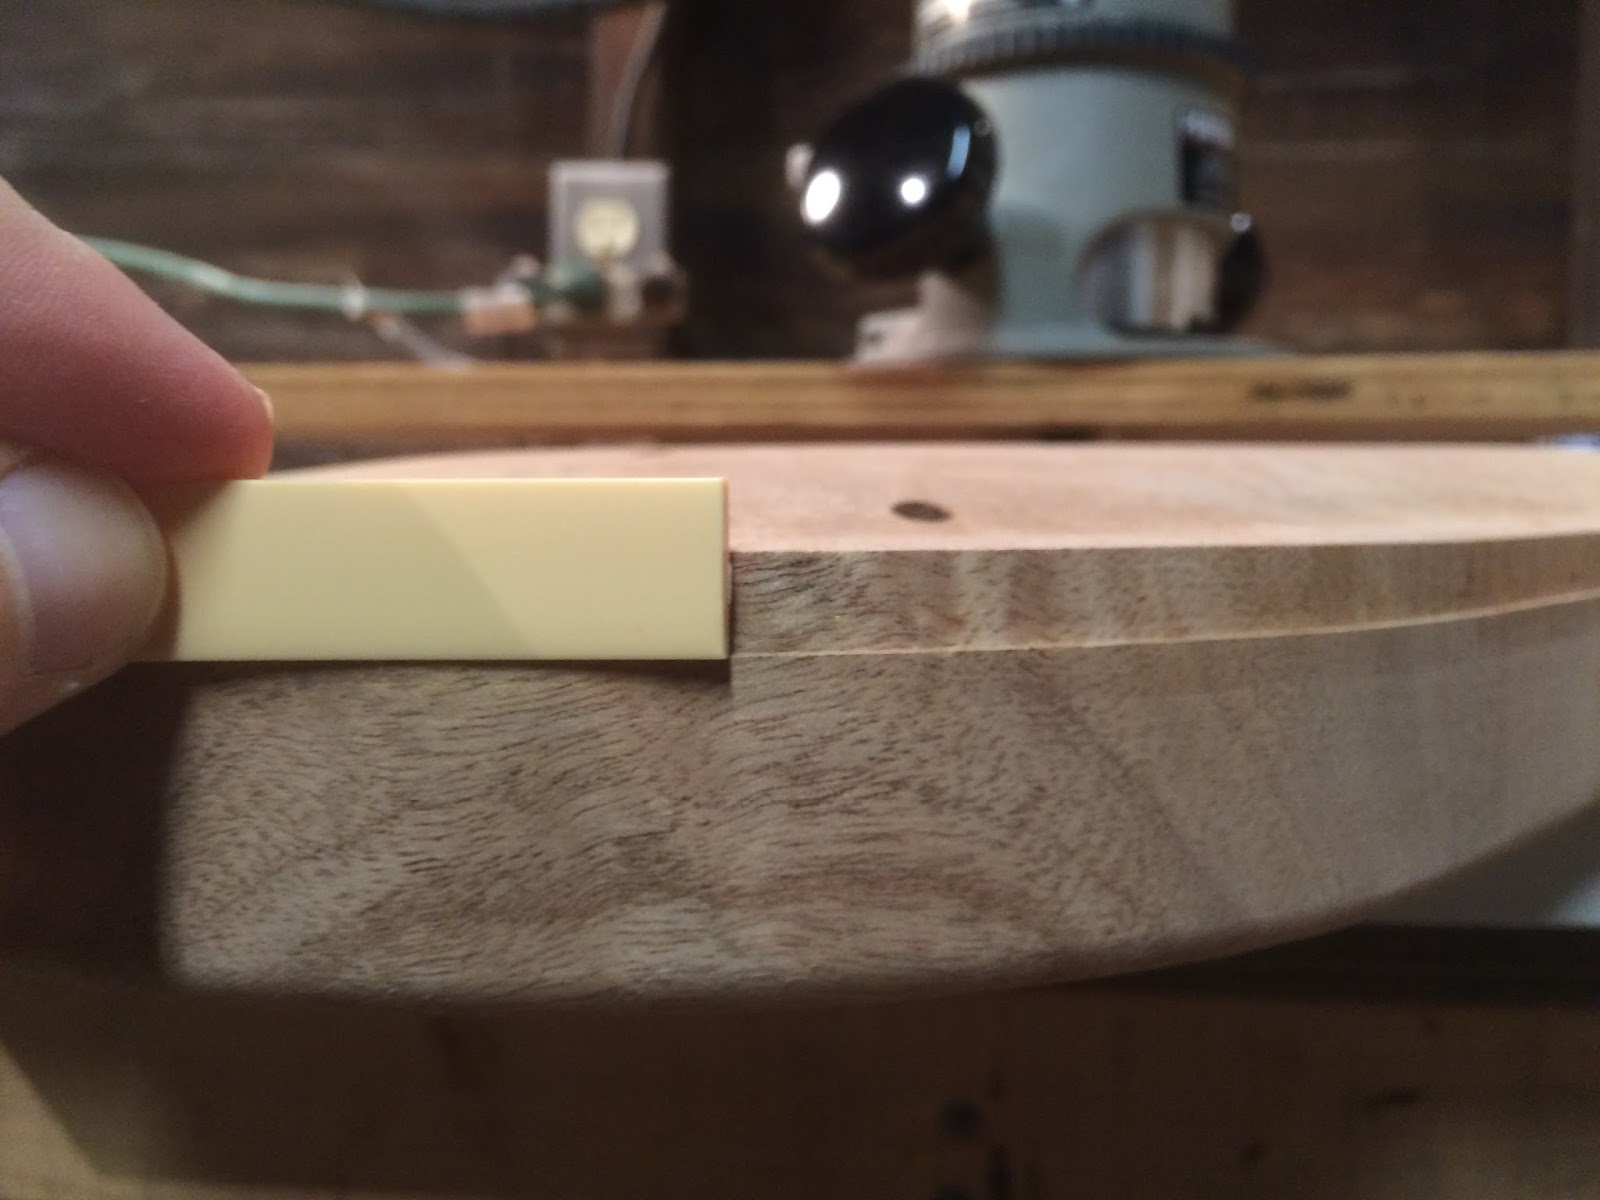
That looks pretty deep, right? Perhaps a little too deep? It doesn't match up with the rest of the binding channel, does it? No. It doesn't. But it's not supposed to. I knew the binding channel around the neck was going to be much deeper than the rest of the body due to the way the top was carved. If you look at all the templates that I made for the top carve - they all have one thing in common - they mask this area of the guitar. So, this part of the guitar is closest to the original size of the lumber. I did route an angle into this area but it's still higher than the rest of the carved top.
I took a small piece of binding and placed it in the channel at different locations around the body to illustrate:
 |
| I know what you're thinking... |
 |
| You are saying to yourself... |
 |
| Where does this guy... |
 |
| Get his nails done? |
As you can see - there are a lot of places where the binding will need to be scraped away (quite a bit towards the butt of the guitar). In the neck pocket I'll probably sand the top of the body down to meet the binding instead of trying to layer the binding to fit the channel. Believe it or not this is how Gibson did this on older versions of Les Pauls. If it looks silly I may change my mind - but for now - I'm gonna leave it.
It's never a bad idea to clean up the route. I made a couple of light passes with the card scraper, a utility blade (to really get into the corners), and some sandpaper wrapped around a piece of binding.
 |
| Do you know how to use this thing? |
 |
| Stick 'em with the pointy end |
 |
| That's the essence of it, yes. |


 |
| Soon... |
No comments:
Post a Comment