Thursday, October 29, 2015

I'm fixing a hole

Insert inappropriate comment here.
I took a break from working on the binding...
Things were not going well -- and it was probably a good idea to focus on something else for a while.  So, I thought I'd dig some holes!

Because I changed the headstock to look more like a classic Les Paul shape the holes for the tuning pegs were now a little too close to the edge.  Also - they just didn't look quite right - which is almost as important.  Therefore I need to move the holes.  In order to do that - I have to fill the existing ones.  In my search for dowels to fill said holes I found some poplar dowels that were very close to the color of the maple neck and as a plus they had similar grain patterns - so I thought it might be easier to blend them into the headstock.  The one issue is that the dowel was about a 16th of an inch bigger than the existing holes.  So those holes needed to be reamed.
Hence the drill press above.

It's a good thing precision isn't a requirement in luthiery.
Wait.  What?
I then cut six plugs from the dowel and cleaned up the rough edges.  The plugs fit the holes pretty snug but once they were glued up I hoped they would be near seamless.

Drilled.  Reamed.  Plugged.
It's amazing how powerful context is...
...let's just say it's a good thing that I'm putting a laminate over one side of the headstock.

The right tool but not for this job.
The next time I have to do this - I'll use Q-tips to spread the glue.  The glue brush worked but:
  1. You really have to cram it in the hole to spread the glue evenly
  2. The glue dried up before I could clean it off - and now the brush is in the trash.  Which is a waste.
Spread, pounded, and hammered...
What kinda blog you writing again?
Once you have spread the glue and tapped the dowels into the holes it's time to wait until the glue dries.

A couple things:
Because the dowels were all different lengths and the headstock was also not uniformly thick I ended up with a bit of overhand on five of the plugs and a gap on number six.  What to do?

For ease of use I made sure that the overhang was on the back of the headstock - so that all of the plugs were flush on the front face.  This should make it easier to prep for the veneer/lamination I'm going to glue to the front of the headstock.  I shouldn't have to do much sanding/scraping/cutting to get that face flat and ready for glue.  There wasn't a lot of overhang on the back - one of the plugs had to be shaved a bit with a chisel but otherwise the rest should sand flat pretty easily.

I tapped that
The gap...
One of the plugs wasn't long enough and there was an 1/8 of an inch gap between the front of the headstock and the top of the dowel.  Because I'm gluing a veneer/laminate top to the headstock - I probably could have gotten away with just filling it with glue and calling it a day - no one would ever see it.  But I didn't want to do that.  So I glued in another plug to fill the gap - with the understanding that I'd have to saw it off with the flush trim saw.  I did try to pound the plug out and start over - but the fit was tight enough (and the dowel had swelled enough) that it wouldn't budge.  So, I know the hole is well filled - but you know - more work!
Next time I might use longer plugs (or just measure them more precisely).

Nice trim!
...yeah, the joke gets a bit old after a while...
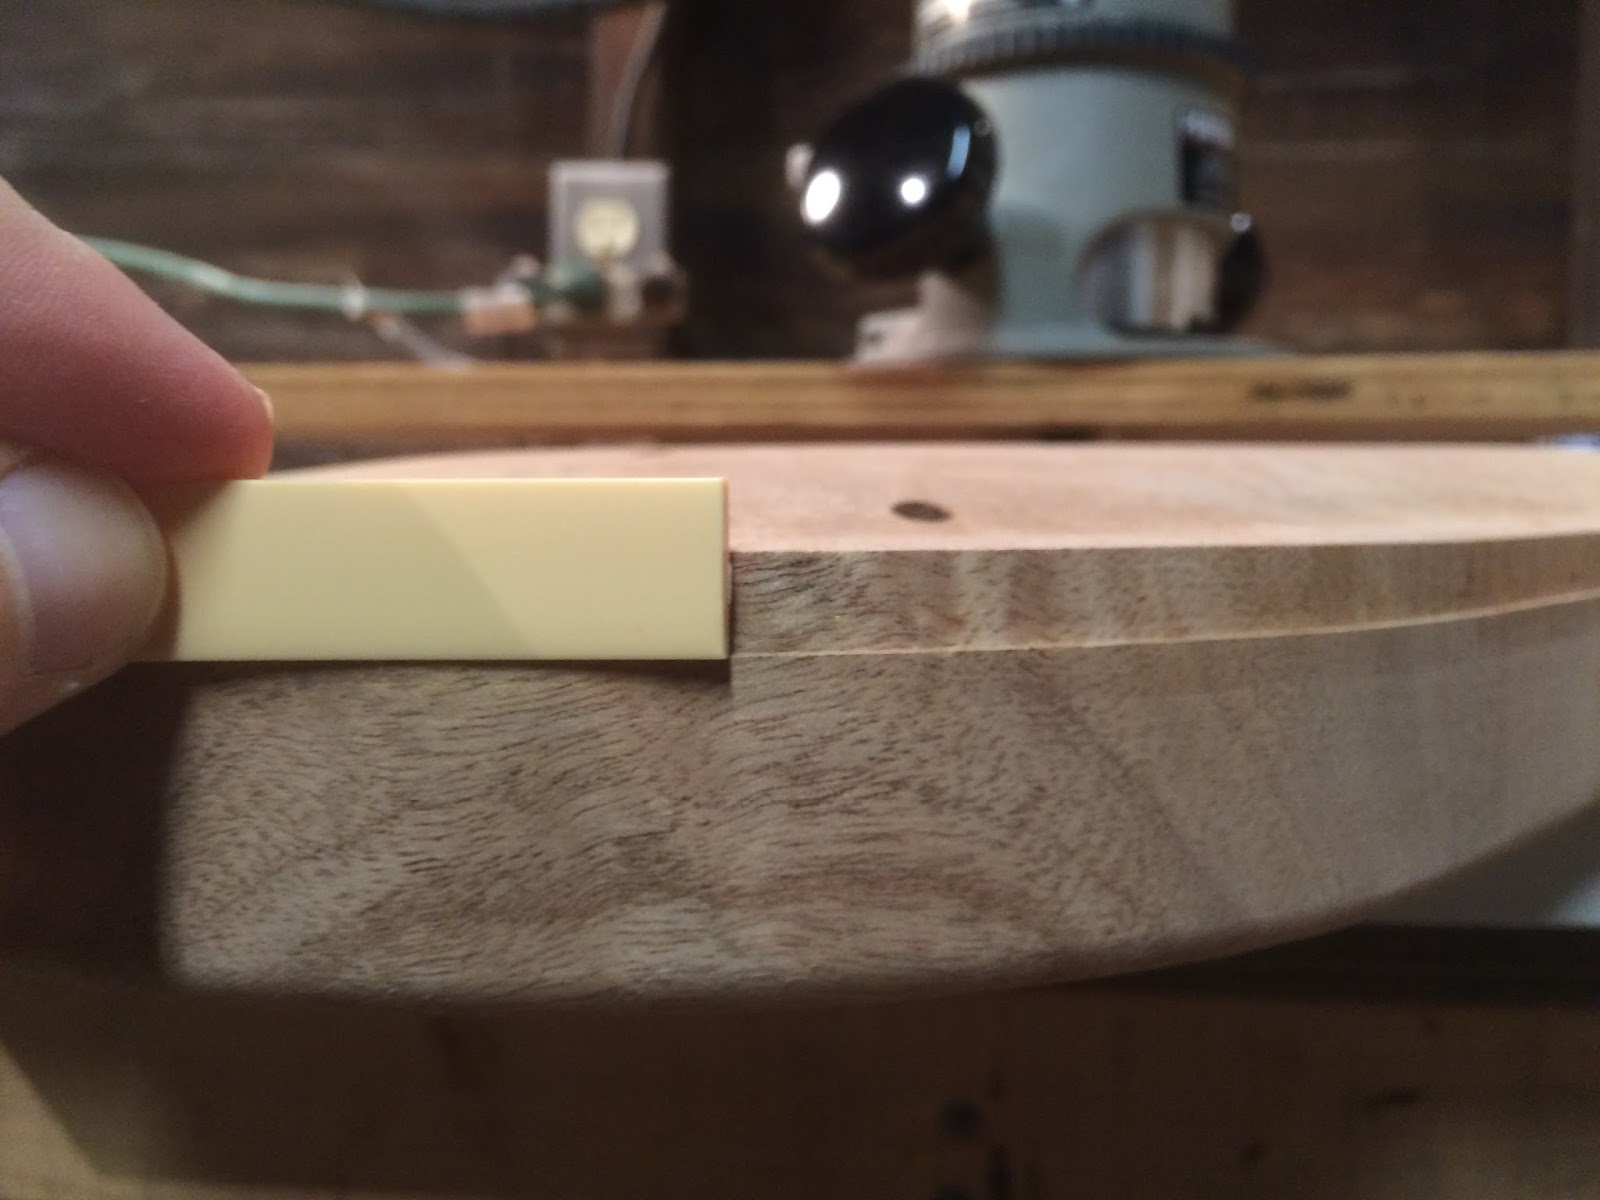
Once the glue was dry (or so I thought) I cut off the extra dowel and this is where we are:

Just as an FYI - in a perfect world they'd all look like the top left one.
It turns out - the glue wasn't fully dry.  Because of that the dowel didn't come out clean - it chipped.

Chip off the old...
...dowel?  That doesn't make any sense.
After a mild application of sawdust and glue - we are left with this:


At the end of the day - this doesn't have to be perfect.  It's going to be covered.
The back of the headstock however won't be completely covered - so I kind of have to get that one right.  I made the decision to wait to work on the back of the headstock another night. 

Some thoughts in the back of my head: 

Headstock thickness. Once the veneer is glued in place the headstock is going to be thicker than it was before.  I've been pretty good about sanding the veneer and the headstock down to minimize this effect but there is the real possibility that the tuning pegs won't be long enough.

End grain:  Poplar and maple are very different kinds of woods.  Maple is three times as hard as poplar) Add to that their different grain orientations in the above example - and things could get interesting down the line.  In the above pictures you are looking at the face grain of the maple and the end grain of the poplar plug.   End grain reacts different than face grain when it comes to drilling and staining/finishing.  End grain will usually split easier than face grain (think about how you chop wood) but end grain will also suck up stain better than face grain.  So, what I'm saying is that I need to be careful when I redrill the holes and I need to think about the best way to color/stain this headstock when the time comes.

Much to think on, I will.


Wednesday, October 21, 2015

Rebound?

Not pictured: Shredded Cheese
Somewhere in the back of my head I conveniently forgot exactly how long it takes to scrape binding. I was thinking this would take me 30 minutes - maybe an hour.
Ha!  Two and a half hours later I was left with the pile of shavings in the above picture (and about half that much on the shop floor as well).

So how did we get here?

Remember a few posts ago when I said "Don't slop it on" when referring to applying the binding goop.  Yeah, I should learn to follow my own advice...

"Don't slop it on" you say?
I did the exact opposite of not slopping it on - and had to deal with the consequences of that.  Namely - scraping and scraping and - oh look - more scraping!  Here's how you do it:

Not pictured: Accuracy
First off, this isn't how you hold a card scraper.  You use two hands.  I was taking pictures with one hand and trying to simulate scraping with another - so this isn't really accurate.  Check out the video below to see how this was really done.


The card scraper is a wonderful tool.  You can use it on a push stroke or pull stroke, it is fairly easy to sharpen, and comes in a multitude of sizes and shapes.  One thing some people do is round off the sharp corners on their card scrapers - so that they don't gouge things with those pointy edges.  Some day I will do this - as I did indeed gouge the top a couple of times and had to sand those (rather large) scratches out.

You do this for a while...
I didn't take any pictures of it - but I also used the goose-neck card scraper to get into the curves.  It's the same process - you need to make sure you don't take off too much wood - just binding.  Again, take it slow - if you are seeing more wood shavings than binding shavings you probably want to ease off.

The sides are even easier to work on as you have a built in guide to help you scrape a straight line.  You do need to keep a close eye on how much you are taking off though.  I was a little too aggressive on some parts of the sides and now the binding is a tad too thin in those places.

No, I did not get that scar working on guitars.
I got it while gardening of all things...
Now might also be a good time to talk about consequences.  You see, when you glop on binding paste really thick you run the risk of it not fully curing.  Which is what happened to me.  Even though this had 24 hours to harden - some of the goop was still goopy (or at least gummy) and because of that it wouldn't scrape.  It was like trying to scrape putty - it kind of works - but not really.

My guess is that these didn't harden because the goop was piled on so high the acetone couldn't fully evaporate.  In theory if I leave these now exposed gummy sections to cure overnight they should fully harden.  That's what I'm going to try anyway.  I'll let you know how it goes.  This was mostly a problem at the horn/cut-away.  But there were a few other areas that exhibited this behavior.  Gladly most of the binding was cured and hardened.

Hmmm...
Is that what I think it is?
It is pretty neat to see the finished product appear out of this chaos.  It's kind of like the first time you develop a picture in a darkroom - something beautiful slowly reveals itself.

Once I had finished scraping I did some sanding.
...okay, I did a lot of sanding.

In addition to the scratches on the top created by the edge of the card scraper the basswood strips (the light colored wood in the middle) were damaged by the masking tape.  When I pulled off the tape - strips of basswood came with it.  Anyone who has worked on a spruce top acoustic will know all about this - as it's a common problem.  I've never worked with basswood before - so I wasn't expecting this.  It didn't take a lot of sanding to fix - but just FYI.

After about two hours of scraping and sanding this is how things look:

Oh...

My...

I kind of like that...

Yeah, that will do nicely
Just so we are all on the same page - this is far (far, far, far) from perfect.  As you can see - there's a considerable amount of clean up to do on the horn.  But I need to wait until things are fully cured before I can go after this.

It looks like a wad of gum.
...kind of has the texture of gum too...
What you can't see is that the binding is thinner in some places and thicker in other places.  There are areas that I'll need to drop-fill with more goop and there are places I may just have to accept as imperfect.  I believe they call this having character.

As this is the first time I've bound a guitar in five years and the first time I've used plastic binding in seven years - I'll chalk this one up as a learning experience.


Pictured: A teachable moment

Inbound

Well, this is a fine mess...
When I removed all the tape I was left with...
Kind of a big mess.  There was dried binding goop where there shouldn't be and sadly not enough where there should be.  The horn was pretty sad looking - as I figured it would be - and there were a couple of other gaps that needed to be filled.  What to do...?

I made a second batch of binding paste and let it sit for 24 hours.  So, by the time I got to it - the goop was pretty goopy and perfect for applying to all of the mistakes.

I pretty much bathed - nay, marinated - the body in binding goop to try and cover my mistakes.  I let that sit for another 24 hours and here's what we've got:


Mistakes?  Where?
An even bigger mess...

There's a lot of extra sauce on that pasta
That'll buff right out

It's time to scrape off all the excess binding and see where we stand.  Will it clean up all nice-like or will we be in some deep yoghurt?

...I will tell you one thing.  I regret laying the goop on as thick as I did....


Tuesday, October 20, 2015

Bound

Snip snip snip

In my last post I prepped the body to be bound.  It entailed two major steps: Pre-bending the binding into a Les Paul shape and cutting a channel around the body blank for the binding to sit in.
So - let's glue in that binding!

There are a bunch of options to choose from when gluing binding to a wood guitar body.  I went with the option that was going to hide my mistakes the best (and it's good that I did - as we shall see).

The process I'm using is to create binding paste (aka binding goop).  Binding paste is made up of acetone and binding - specifically small pieces of binding.  The acetone melts the plastic binding into a goo-like substance that hopefully has the  consistency of elmer's white glue.  The paste sticks to the wood and melts the binding until the acetone evaporates.  So, you end up gluing the binding with itself.  It's supposed to cover any goofs because it fills any cracks with more binding that will eventually harden and be indistinguishable from the solid stuff.

Here's how you make it:

Mmmmm...
Biege Chicklets
Cut up about two inches of extra binding using a pair of snips or cutters to make a bunch of tiny binding bits about the size of tick-tacks.  If you make them smaller the bits will dissolve faster - if you make them bigger it will still work but it will take longer.

I forgot to rotate the photo.
Think of it as an excuse to stretch your neck
Add in just enough acetone to cover the binding bits.  If you use too much the acetone paste will be thin - you want it to flow slowly.  

Couple things about working with Acetone:  You probably want to mix up the paste in a glass or ceramic bowl.  The acetone will likely eat your mixing bowl if it's made out of plastic.  I am unsure what it will do to a metal bowl but seeing as acetone comes in metal cans - you are probably safe. 

Acetone is the main ingredient in nail polish remover - but it is more concentrated (maybe that's why nail polish remover comes in plastic bottles and acetone doesn't...?).  But it is recognized by the state of California to be hazardous to your health - so don't bathe in the stuff.

You want to cover the mixture so that the acetone doesn't evaporate and let it sit for a few hours.
I poured in the acetone (which is clear) and it did this within seconds (see below).

Mmmm... Beige Chicklets
... that are melting.  Um, no thanks
I did stir it a bit with a wooden skewer (don't use Mom's silver!).  Within a couple of minutes the acetone is opaque and it's time to let it sit.

About four hours later the paste was ready to use.  If you find that your paste is too thin - add more binding chips (or you can try letting the acetone evaporate a bit).  If it's too thick - add more acetone.

The five year old 'chemist' in me loves this almost as
much as mixing vinegar and baking soda
Once your paste is the right consistency - you should get ready to start.  It always feels like you need an extra pair of hands when you install binding - so anything you can do to prep is going to make your life easier.  I cut out a bunch of strips of tape - so that I could just grab one and go.
I like my workspaces like I like my jackets - with fringe.
You may have noticed that the above photo was not taken in my shop.  My shop isn't heated and the temp dipped to 32 degrees - so I moved everything inside for this part.  I'm not just being a pansy - the binding will become too rigid to work with in that kind of cold.
...although to be honest I'm not looking forward to the winter temps in the shop.

What could possibly go wrong?
I don't know about you - but my parents raised me to do the hardest part of any task first - so that you get it out of the way.  As I've grown older I prefer to start with the low hanging fruit.  I like to work up a steam by finishing the small tasks first.  Sometimes you should listen to your parent's advice...

It's gonna be a walk in the park
The horn and the cut-away are going to be the hardest thing to bind.  I knew that going into this and still chose to do it last.  That was a bad idea.  My rationale was that I wanted to get a little practice in and work up a rhythm by starting easy and ending on this part.  I probably won't do that on the next build.  The reason being that because I pre-bent the binding on a template that was bigger than the body blank - they were not a perfect match.  So, when I got to this point nothing lined up.  I'll show you what I did to fix it - but this felt like a good place to mention it.  Start off with the hard part and everything else will be smooth sailing.

Yum!
So, once you get started with this process - It's hard to stop and take pictures.  You really need to stay focused.  Here then is my description of how it should go down:  Spread the goop onto the channel you routed on the body.  I worked in 2 or 3 inch sections (Until I got to the butt of the guitar and then I did 3 or 4 inch sections at a time).  You want it on the side and the bottom of the channel - pretty much anywhere the binding is going to touch the wood.  Don't slop it on - as the masking tape won't stick to wet wood - but be generous enough to get everything good and covered.

Hold the binding as tight as you can against the body - remembering to press in and down - as the binding channel has a lip.  Then start taping the binding to the body.  Obviously don't tape past where you have spread the goop.  I would leave about a half inch between the last piece of tape and where I spread the goop - to give myself a little play to stick a glue brush between the binding and the wood - in case I didn't have enough goop in there.  If you notice a gap that you can't fix by squeezing a little tighter - then try and drop-fill the crack with more goop.  It's going to dry as hard as the original binding and you can even it out later.

Tastes like chicken!

Halfway there and I need more tape
I was able to stop when I got to the butt of the guitar and take some pictures.  Let me re-phrase that...
I was forced to stop as I had run out of tape strips.  Here's where we stand:

Looks...
...good?
Here's the problem when you glue beige binding with beige goop and tape it down with beige tape.  It's kind of hard to see what's going on.  I think this section is going to be fine.  I won't know until I take the tape off.  That's why it's useful to use your fingers to determine if the binding is well seated.  If it can move around - you're doing it wrong.

Round Two!
Fight!!!
I kept going using the same process but I already knew that the binding wasn't going to match up to the body.  The binding horn and the body horn were misaligned by about a half inch.  Which meant I had to stop what I was doing - run to the workshop - get my heat gun - and reshape the horn.  All while trying to keep the binding in place.  One thing I will mention:  The heat gun will dry (or is it cook?) your binding paste.  So, bend the binding with the heat gun and then apply the paste.

I had a difficult time bending the binding around the horn when I was just pre-bending it.
Adding in the extra complexities of holding the binding in place while gluing it and taping it and heating it/reshaping it (all while not damaging what I've already bound) meant that it was quite messed up by the time I was done.  Additionally, I was running out of goop because the acetone was starting to evaporate (it evaporates quicker as you have less in the bowl it seems).  So, I was left with what I'm guessing will be a bit of clean-up work.

Just squint a little and it looks great!

Almost, but not quite, just enough

Speaking of messes...
As you can see the goop dries pretty quick.  On the guitar, on your workbench, and on your fingers.
I could have just wiped my fingers with more acetone but I chose to use soap and an abrasive.  It came off fairly well.  If you had that kind of patience - you could also pull off the flakes like dried elmer's glue but I was all done by this point.

Here there be dragons
I'm not quite sure what to expect - but there is some touch-up work in store for me - no doubt.
I already started mixing up another batch of binding goop to take care of any mistakes I may have to cover.  So tomorrow, when I pull off all this tape we'll see what's what.

Monday, October 19, 2015

Unbound

Perfect!  Don't change a thing.

Binding is one of those things...  When it's done well it makes everything look super fantastic and if you mess it up - there's pretty much no way to hide it.  So, let's aim for 'done well' rather than messed up. Sound good? 

The binding I purchased is fairly long and will allow me to go around the body in one shot.  You can bind the body using two pieces that meet at the butt of the guitar.  Quite often that's how acoustic instruments are bound but it's hard to hide the joint and with plastic binding there's not much impetus to do it that way.  Gluing this much binding all at once can be tricky - but there are ways to prep it for installation - one of those ways is to pre-bend it

The binding is pretty thick and while it is pliable it tends to spring back into it's original shape.  The best way to fix that is with a heat gun.  
Heat gun you say?  Looks like a hair dryer to me.
As an aside - heat guns are for stripping old paint off of wood.  So, yes, they get quite hot.
I'm just gonna put this out there:  Don't use a heat gun as a hair dryer.  Just don't do it.

The goal is to warm the plastic enough to make it very pliable (not melted) - then quickly shape it before it cools.  Once it does cool it should retain the new shape.  As I had the routing template I made for the Les Paul kicking around the shop - that seemed like the right thing to tape it to.  It's not a perfect match for the guitar body but it will be close enough.

Perspective is a funny thing.  It's a heat gun - not a heat cannon.
It looks like I taped it down and then applied heat to the binding - but really what's going on here is I'm keeping the rest of the binding out of my way.  Since you can only warm up, shape, and tape about 3 or 4 inches at a time - I would work on a section and tack it down with a bunch of masking tape - then move along the body to the next 3-4 inch section.  Those pieces of tape that are really spaced apart would be discarded or reused when I got to that section of the body.

There's always one in every crowd...
The toughest section is the horn and cut-away due to the sharp turn the binding has to make.
I went back after taking this photo and redid that section - as it wasn't quite right.  As you can see - you need a bunch of tape for this part.

One note: I had the heat gun really close to the binding while I was working on this section - like 1 to 2 inches away.  That's probably a little too close.  2 to 4 inches would have been smarter.  The reason I think this is is because the binding drooped (as in toward the floor) when I was bending it around the horn.  That drooping changed the shape of the binding (the word I'm so studiously avoiding is malformed), so it looks like there is a bit of a twist in that section of the binding.

The method of gluing, scraping, and sanding the binding after it is installed should fix or hide the twist.

...I hope...

I can't tonight - I'm all tied up.
So now this guy sits while I find a more permanent home for him...


Looks like another jig to me, Jebediah. What say you?
Ayep. That's a jig all right.
Here's the thing about binding an arched top...
It's arched.  So, you can't rest a router on top and make a straight channel for the binding to sit in.
You have to go build something (or buy something) to make a uniform channel.
This is what I built:

Keep all hands and feet away from the spinning blades of death.


Two asides:
1) I have had to build more jigs and templates on this project than on my four previous guitar builds combined.  Les Paul's are not easy to make (it explains why they cost so much to buy).

2) This isn't the safest jig in the world.  It worked fine for this task but there are better ways to do this.  The guitar body could have easily become jammed between the router blade and one of the side supports.  It's always a good idea to have a place for the the wood to go if it gets thrown by a tool.  This jig only allows for two ways - out the back or back in your face.  So next time I may try to build a pin router.

Okay, one last aside: I used a piece of white Ikea shelving to raise the workpiece up high enough for the blade to cut the channel.  I chose the shelf material because it was so smooth that the work piece would slide over it easily (the better to eat you with my dear).  You could also use melamine for this.

Come closer...
This bit has a ball bearing on it that is smaller than the blade circumference - when the ball bearing touches the work piece the blade cuts in a little deeper than the bearing.  You can buy bits and bearings of different sizes to make larger or smaller channels.  I knew from testing on a piece of scrap that the binding was going to be about 1/32 of an inch bigger than the channel - so I'll have to scrape off the extra with a cabinet scraper.  Better to be a little bigger than a little smaller in this case.

As you can see from the above pictures I clamped the jig to the workbench (I also clamped the Ikea shelf too but didn't take a picture of that) so everything was rock solid.  Put your safety glasses on, hit the power button and whisper a fond farewell to your fingers.

I wouldn't hurt a fly...
...on that note.  I kept the work piece between me and the router bit at all times.  Yes, it would suck to damage the body after doing so much work on it.  It would suck much more to lose a finger.  My heart rate still spikes every time I turn the router on.  It's a healthy reaction.  End of PSA.

One of the best ways to avoid having the router throw the work piece is to be aware of which direction the blade is spinning and to "always feed against the rotation of the blade."

As you can see - it worked!  The router/jig combo made a fairly neat cut.  I made two slips but was able to clean them up by making a second pass that was a 1/16th of an inch deeper than the first cut.  Since the binding is so big that wasn't an issue.  ...sort of.

Eh!?  Eh?!!

Not too shabby!

Look at them appl...
Wait, what?
That looks pretty deep, right?  Perhaps a little too deep?  It doesn't match up with the rest of the binding channel, does it?  No.  It doesn't.  But it's not supposed to.  I knew the binding channel  around the neck was going to be much deeper than the rest of the body due to the way the top was carved.  If you look at all the templates that I made for the top carve - they all have one thing in common - they mask this area of the guitar.  So, this part of the guitar is closest to the original size of the lumber.  I did route an angle into this area but it's still higher than the rest of the carved top.

I took a small piece of binding and placed it in the channel at different locations around the body to illustrate:
I know what you're thinking...

You are saying to yourself...

Where does this guy...
Get his nails done?

As you can see - there are a lot of places where the binding will need to be scraped away (quite a bit towards the butt of the guitar).  In the neck pocket I'll probably sand the top of the body down to meet the binding instead of trying to layer the binding to fit the channel.  Believe it or not this is how Gibson did this on older versions of Les Pauls.  If it looks silly I may change my mind - but for now - I'm gonna leave it.

It's never a bad idea to clean up the route.  I made a couple of light passes with the card scraper, a utility blade (to really get into the corners), and some sandpaper wrapped around a piece of binding.

Do you know how to use this thing?

Stick 'em with the pointy end


That's the essence of it, yes.
And now I'm ready to bind this sucker.  But obnoxiously enough I'm undecided as to which adhesive to use: Weld-on cement, Wood glue, Super-glue, epoxy, or binding paste (aka binding goo) are all viable options.  So, while I go do some research - here's where we stand:


Soon...